Maintaining sharp knives is crucial for safety and efficiency, and angle guide sharpening offers a consistent method. It helps achieve professional results, especially for beginners, ensuring precise blade geometry.
What is Angle Guide Sharpening?
Angle guide sharpening is a knife sharpening technique employing a tool that secures to the blade, dictating a consistent angle during the sharpening process. This method removes guesswork, crucial for maintaining a knife’s edge. Unlike freehand sharpening, it provides a physical reference, ensuring uniform abrasion along the blade’s bevel. This is particularly beneficial for those new to sharpening or struggling with consistent angles. It’s about precision, repeatability, and achieving a keen, lasting edge, vital for culinary tasks and beyond.
Why Use an Angle Guide?
Employing an angle guide dramatically improves sharpening consistency, eliminating the learning curve of freehand methods. It’s ideal for beginners, ensuring a correct and repeatable angle every time. Guides prevent over-sharpening or inconsistent edges, preserving blade life and performance. They are especially valuable for Japanese knives requiring precise bevels. Ultimately, an angle guide delivers professional-quality results with less effort, making it a worthwhile investment for anyone seeking reliably sharp knives and enhanced kitchen safety.

Types of Angle Guides
Angle guides come in fixed, adjustable, and magnetic varieties, each offering unique benefits for different sharpening setups and user preferences.
Fixed Angle Guides
Fixed angle guides are the simplest type, offering a pre-set sharpening angle. These are excellent for beginners as they eliminate guesswork, promoting consistent results with minimal effort. Typically, they clamp onto the knife blade, maintaining the desired angle throughout the sharpening process.
However, their inflexibility means they are best suited for knives requiring a single, specific angle. Changing the angle necessitates switching to a different guide. They are often constructed from durable materials like plastic or metal, providing stability during use and ensuring long-lasting performance.
Adjustable Angle Guides
Adjustable angle guides provide versatility, allowing users to customize the sharpening angle to suit different knife types. These guides typically feature a mechanism to lock in the desired angle, offering precision and control. This adaptability makes them ideal for sharpening a diverse collection of blades, from chef’s knives to specialized tools.
While requiring a bit more setup than fixed guides, they offer significant flexibility. Many adjustable guides include markings for common angles, simplifying the process. They are often favored by experienced sharpeners who need to cater to varying blade geometries.
Magnetic Angle Guides
Magnetic angle guides utilize strong magnets to securely attach to the knife blade, providing a stable platform for sharpening. These guides are particularly useful for curved blades where clamping can be difficult. The magnetic connection allows for easy attachment and removal, streamlining the sharpening process.
They often offer adjustable angles, combining the convenience of magnetic attachment with the versatility of customization. However, ensure the magnet doesn’t interfere with the sharpening stone or plate during use.

Essential Sharpening Tools
Successful angle guide sharpening requires quality tools: sharpening stones, diamond plates, and honing steels. Each plays a vital role in achieving and maintaining a razor-sharp edge.
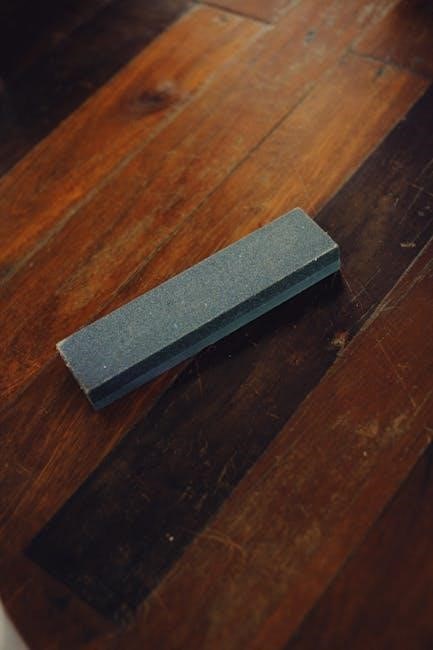
Sharpening Stones (Water Stones vs. Oil Stones)
Sharpening stones are fundamental for angle guide work, with water stones and oil stones being the primary choices. Water stones, utilizing water as a lubricant, cut faster and produce a finer edge, requiring regular flattening. Oil stones, conversely, employ oil, offering slower cutting but less frequent flattening needs.
The grit of the stone dictates the aggressiveness of the sharpening process; coarser grits remove material quickly, while finer grits refine the edge. When using an angle guide, consistent stone selection and lubrication are key to achieving optimal results and a durable, sharp blade.
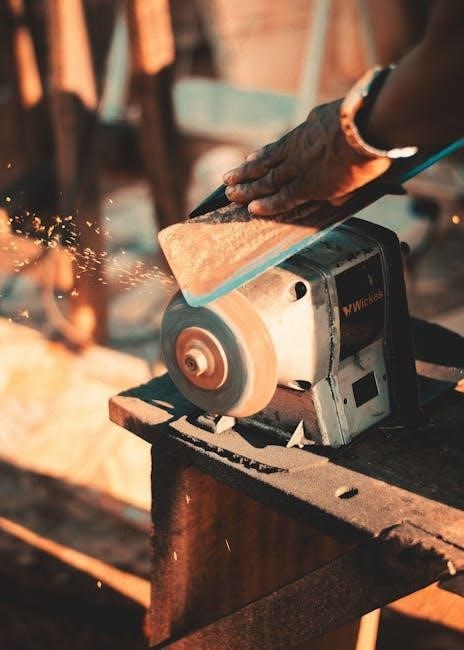
Diamond Sharpening Plates
Diamond sharpening plates present a modern alternative to traditional stones, offering exceptional hardness and cutting speed when paired with an angle guide. These plates, coated with industrial diamonds, excel at reshaping dull edges and work efficiently on harder steel types.
Available in various grits, diamond plates require minimal lubrication – often just water – and maintain their flatness for extended periods. Utilizing an angle guide with a diamond plate ensures consistent angle maintenance, leading to a remarkably sharp and long-lasting edge on your knives.
Honing Steels
Honing steels, though not for sharpening, are vital for maintaining a knife’s edge between sharpening sessions when using an angle guide. They realign the microscopic teeth of the blade, restoring a perceived sharpness and improving cutting performance.
Employing a honing steel with a consistent angle – achievable with an angle guide’s assistance – prevents further dulling. Regular honing extends the time between full sharpenings, preserving the blade’s geometry and maximizing its lifespan. Remember honing doesn’t remove metal, it simply straightens it.
Setting Up Your Angle Guide
Proper setup is key for effective sharpening. Securely attach the guide to the blade, adjust to the desired angle, and ensure stability for consistent results.
Attaching the Guide to the Knife
Begin by carefully positioning the angle guide onto the knife blade, ensuring a snug and secure fit. Most guides utilize a clamping mechanism or magnetic attachment for stability; Verify the guide is aligned with the blade’s edge, avoiding any wobble or slippage during the sharpening process. A firm attachment is paramount; otherwise, inconsistent angles and potentially dangerous situations can arise. Double-check that the guide doesn’t interfere with the sharpening stone’s surface, allowing for smooth, even strokes. Proper initial attachment sets the foundation for successful sharpening.
Adjusting the Angle
Once attached, precisely adjust the angle guide to your desired sharpening angle. Many guides offer pre-set options or allow for custom adjustments using screws or dials. Refer to the knife type – chef’s knives typically require 15-20 degrees, while Japanese knives may need 10-15. Ensure both sides of the blade will be sharpened at the same angle for symmetry. A protractor or angle finder can verify accuracy. Consistent angle maintenance throughout sharpening is vital for a uniform, effective edge.
Ensuring Stability
A stable setup is paramount for safe and effective sharpening. Securely clamp the angle guide to the knife handle, preventing any wobble during the process. Use a non-slip surface, like a rubber mat, under your sharpening stone or plate. Maintain a firm, controlled grip on both the guide and the blade. Instability leads to inconsistent angles and potential accidents, compromising the sharpness and potentially damaging the blade. Prioritize a solid foundation for optimal results.
The Sharpening Process with an Angle Guide
Utilizing an angle guide involves consistent, controlled strokes along the sharpening stone, establishing and then carefully removing a burr for a refined, sharp edge.
Establishing the Burr
Creating a burr is the initial, vital step in sharpening. With the angle guide secured, apply moderate, consistent pressure while drawing the blade across the sharpening stone. Focus on maintaining the correct angle throughout each stroke.
The burr, a microscopic bend in the metal, indicates you’ve reached the edge. Periodically check for its formation on the opposite side of the blade. Don’t rush this process; patience ensures a proper burr, setting the foundation for a truly sharp edge. Feel for it gently with your thumb.
Removing the Burr
Once a burr is established on both sides, the focus shifts to its removal for a refined, functional edge. Reduce the pressure significantly and alternate strokes, using the angle guide to maintain consistency.
Lightly drag the blade across the stone, gradually diminishing the burr’s size. Avoid creating a new burr during this phase. Stropping on leather or a fine stone further refines the edge, eliminating any remaining microscopic imperfections and achieving peak sharpness.
Alternating Sides
Consistent alternation between sides is vital throughout the sharpening process. Begin with several strokes on one side, then switch to the other, maintaining the guided angle. This ensures symmetrical sharpening and prevents uneven wear on the blade.
Gradually decrease the number of strokes per side as you approach the desired sharpness. Regularly check for burr formation to gauge progress and adjust technique accordingly, ensuring a balanced and effective edge.
Common Sharpening Angles for Different Knives
Knife type dictates the ideal sharpening angle; chef’s knives typically use 15-20 degrees, while Japanese knives often require a sharper 10-15 degree angle.
Chef’s Knives (15-20 degrees)
For versatile chef’s knives, a 15-20 degree angle strikes a balance between sharpness and durability. This range allows for efficient slicing, dicing, and chopping of various ingredients. An angle guide ensures consistent results across the entire blade length, preventing uneven wear. Maintaining this angle provides a robust edge suitable for daily kitchen tasks. Sharpening within this range offers a good compromise, creating a blade that holds an edge well while remaining relatively easy to resharpen when needed. Consistent angle application is key for optimal performance.
Paring Knives (15-20 degrees)
Paring knives, designed for intricate work, also benefit from a 15-20 degree sharpening angle. This range delivers sufficient sharpness for peeling, trimming, and detailed cuts. Utilizing an angle guide is particularly helpful with smaller blades, ensuring precision and consistency. Maintaining this angle provides a delicate yet effective edge for controlled maneuvers. While a slightly steeper angle enhances durability, it can compromise finesse. Consistent sharpening at this angle maximizes the paring knife’s utility for detailed food preparation tasks, offering optimal control.
Japanese Knives (Single Bevel ー 10-15 degrees)
Japanese knives, particularly single-bevel varieties like those used for sashimi, require a precise 10-15 degree sharpening angle. Angle guides are invaluable here, as maintaining this acute angle is challenging freehand. These knives demand specialized sharpening techniques due to their unique blade geometry. Consistent angle maintenance is vital for achieving the renowned sharpness and slicing ability. Improper angles diminish performance and can damage the delicate edge. Careful, guided sharpening preserves the knife’s intended function and extends its lifespan, ensuring clean, effortless cuts.

Troubleshooting Sharpening Issues
Common problems include uneven sharpening, failing to establish a burr, or unsightly scratch marks. Adjusting pressure and angle, or checking stone grit, can resolve these issues.
Uneven Sharpening
Uneven sharpening often stems from inconsistent pressure application or failing to maintain a stable angle throughout the stroke. Ensure the angle guide remains firmly secured to the blade, and practice applying even pressure along the entire length.
Also, verify the sharpening stone or plate is level and clean. Rotating the knife slightly during each stroke can help distribute wear evenly. If using a stone, regularly flatten it to maintain a consistent surface. Consistent, deliberate movements are key to achieving a uniform edge.
Difficulty Establishing a Burr
Struggling to raise a burr indicates insufficient pressure or an incorrect sharpening angle. Confirm the angle guide is properly adjusted for your knife type and that you’re applying firm, consistent downward force during each pass.
Slower, more deliberate strokes are often more effective than rapid movements. Ensure the sharpening stone is adequately lubricated (water or oil, depending on the stone type). A coarser grit can also assist in burr formation, especially when starting with a dull blade.
Scratch Marks on the Blade
Visible scratch marks often stem from abrasive particles embedded within the sharpening stone or plate. Regularly clean your sharpening surface to remove dislodged metal and debris. Using a finer grit stone or diamond plate can minimize scratching, particularly during the finishing stages.
Ensure consistent pressure and avoid excessive force, as this can exacerbate the issue. Inspect the angle guide for any damage or debris that might be causing the marks during the sharpening process.
Maintaining Your Angle Guide
Regular cleaning and inspection are vital for optimal performance. Check for wear, loose parts, and ensure the guide remains stable during use for consistent results.
Cleaning the Guide
After each sharpening session, thoroughly clean your angle guide to remove metal filings and abrasive particles. These remnants can affect future sharpening accuracy and potentially cause corrosion. Use a soft brush or cloth with mild soap and water, ensuring you reach all crevices.
Avoid harsh chemicals or abrasive cleaners, as they could damage the guide’s surface or components. Dry the guide completely before storing it to prevent rust or mildew. A clean guide ensures consistent performance and extends its lifespan, contributing to sharper, safer knives.
Checking for Wear and Tear
Regularly inspect your angle guide for signs of wear and tear. Look for cracks, chips, or looseness in the components, particularly the clamping mechanism and angle adjustment features. Worn parts can compromise the guide’s accuracy and stability, leading to inconsistent sharpening results.
If you notice any damage, consider replacing the affected parts or the entire guide. A well-maintained guide is essential for achieving consistently sharp edges and ensuring safe knife handling. Prioritize safety and precision through routine inspections.
Advanced Techniques
Mastering different grits and stropping refines the edge beyond basic sharpening, achieving a razor-sharp finish and extending the life of your blade.
Using Different Grits
Employing a progression of grits is fundamental to superior sharpening. Start with a coarser grit (e.g., 400-600) to repair damage and establish the bevel. Then, move to medium grits (800-1000) for refining the shape and removing scratches.
Finally, utilize finer grits (3000-8000) to polish the edge, creating a truly sharp and refined cutting surface. Each grit builds upon the previous one, progressively improving the blade’s sharpness and overall quality. Remember to clean the blade between grit changes!
Stropping After Sharpening
Stropping is the final refinement step, aligning the microscopic teeth of the blade for ultimate sharpness. Using a leather strop – often with polishing compound – gently draw the blade across the strop, maintaining the established angle.
This process removes any remaining burr and polishes the edge to a mirror finish. Stropping doesn’t sharpen but rather refines an already sharp edge, extending its longevity and enhancing cutting performance. Repeat several times for optimal results.
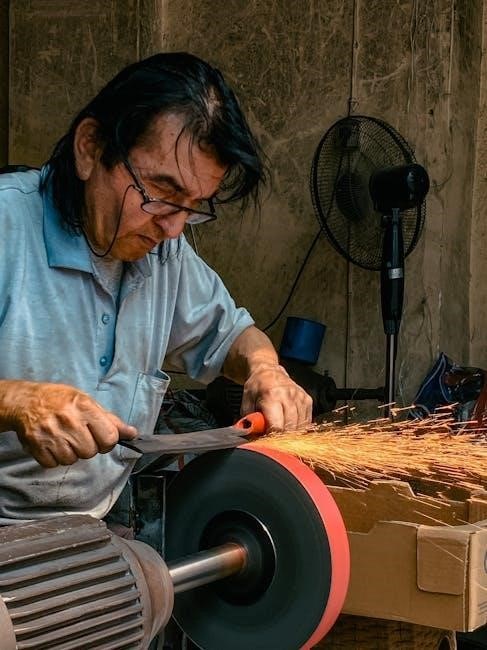
Safety Precautions
Always prioritize safety; secure your grip, use a stable surface, and maintain focus during sharpening. Slow, controlled movements prevent accidents and ensure precision;
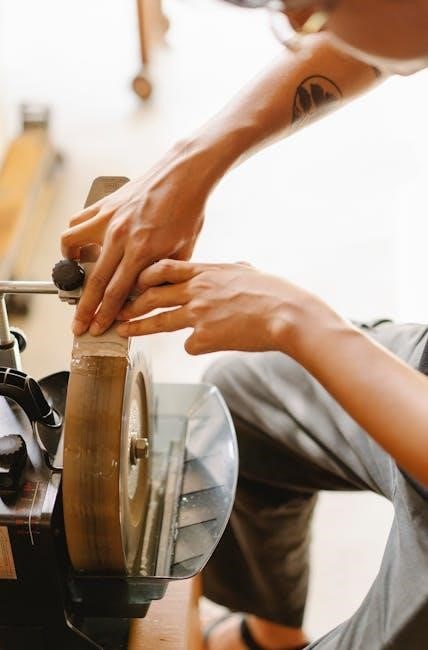
Proper Hand Placement
Maintaining correct hand placement is paramount for safety and control while sharpening. Your guiding hand should gently apply pressure, keeping fingers clear of the blade’s path. The hand holding the knife provides stability, ensuring a consistent angle against the sharpening stone or guide.
Avoid gripping the knife too tightly, as this can lead to fatigue and reduced precision. Keep your elbows tucked in close to your body for enhanced stability and leverage. Remember to always sharpen away from your body, and never towards it, minimizing the risk of accidental cuts.
Using a Non-Slip Surface
A stable work surface is absolutely essential for safe and effective angle guide sharpening. Employing a non-slip mat or damp towel beneath your sharpening stone prevents unwanted movement during the process. This minimizes the risk of slips, ensuring consistent angle maintenance and preventing potential injuries.
Consider using a rubber mat specifically designed for sharpening, or even a silicone baking sheet. A secure base allows you to focus on technique, rather than battling a shifting stone, ultimately leading to sharper, more reliable results.

Resources for Further Learning
Explore online tutorials and sharpening classes to deepen your understanding. These resources offer visual guidance and expert tips for mastering angle guide techniques.
Online Tutorials
Numerous online platforms, like YouTube, host comprehensive angle guide sharpening tutorials. These videos demonstrate various techniques, from basic setup to advanced sharpening methods, catering to all skill levels. Search for channels dedicated to knife sharpening or specific angle guide brands for focused instruction. Websites dedicated to culinary skills often include detailed guides with step-by-step photos.
Furthermore, forums and online communities provide spaces to ask questions, share experiences, and receive feedback from experienced sharpeners. These resources are invaluable for troubleshooting issues and refining your technique, offering a collaborative learning environment.
Sharpening Classes
Hands-on sharpening classes, offered by culinary schools or professional sharpeners, provide personalized instruction. These courses often cover angle guide sharpening techniques alongside broader sharpening principles, allowing for direct feedback and skill development. Learning from an expert ensures proper form and addresses individual challenges effectively;
Additionally, some knife retailers host workshops demonstrating sharpening methods, including the use of angle guides. These classes are a great way to learn about different sharpening tools and find the best fit for your needs, fostering confidence and precision.